Materials:
- Pan or tray (e.g., an old baking pan, aluminum pan, left over plastic food trays, or other shallow plastic containers)
- Potting soil
- Fast-growing seeds (rye grass, wheatgrass, beans, or microgreens)
- Assorted craft supplies
- A copy of a favorite book
Instructions
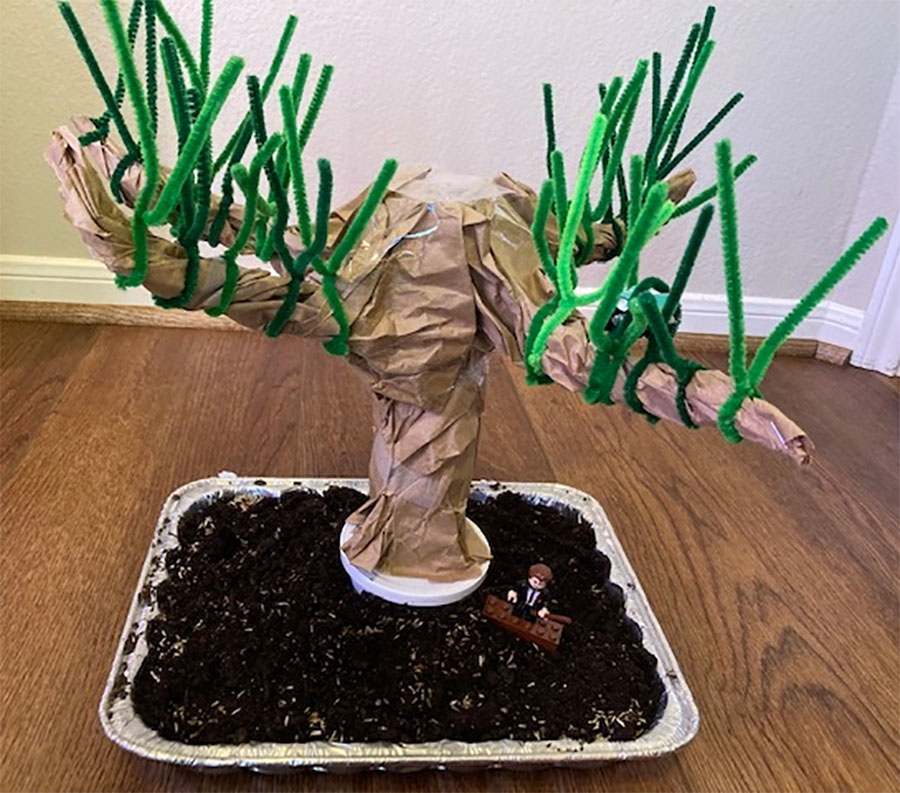
Making a diorama is an education tradition. In simple terms, a diorama is a 3-D model of a scene. It can represent a period of time, an event, or a story. Most adults can remember at least one shoebox diorama project they proudly carted to school from their childhood. With a waterproof container, a little bit of soil, and some fast-growing seeds, you can turn this classic activity into garden fun.
- Start by selecting a favorite book that features plants or contains a nature-based scene. From Tops and Bottoms to The Secret Garden, there are tons of amazing garden-focused books out there to choose from. The book does not need to have a botanical focus. Just check out our picture of Harry Potter’s Whomping Willow, above. If you are looking for ideas, you may want to check out The Growing Good Kids Book Awards from The Junior Master Gardener Program and The American Horticultural Society, or The Ready Set Grow! list of Multicultural Collection of Farm to ECE Books created by The Pennsylvania Head Start Association and The Food Trust.
- Map out a design on paper. Pick a favorite scene or setting from the book and sketch out your model. Let your imagination run wild, but also begin to think about the mechanics of creating it too. Decide where and how you want to incorporate plantings.
- With the design in hand, begin the hunt through your home or classroom in search of materials you can repurpose to make your design. Remember that any objects touching the soil will need to be waterproof and any elements that can be damaged by water should be elevated. Also, obtain your fast-growing seeds.
- Let construction begin! Fill your tray-like container with moist potting soil. If you have a second tray that can catch the excess water, you can drill small holes in your first try for drainage. If this is not an option, then you will just need to be careful not to overwater your plantings.
- Place your props in your soil. Try to make them as sturdy as possible to allow for relocation/transport of the diorama as needed for sharing.
- Place your diorama in a warm spot with good lighting (either from the sun or grow lights). Keep soil moist. If your environment is dry, you may want to cover the soil with plastic wrap until your seeds germinate. Make sure to prop the plastic up with toothpicks so it does not touch the soil or you seeds may sprout and get stuck to the plastic.
- Wait for your diorama to grow in and then show it off to friends and family. Can they guess what book it is from? Can your young gardeners read the book to them? This project literally brings books to life — engaging reader’s senses and imaginations!